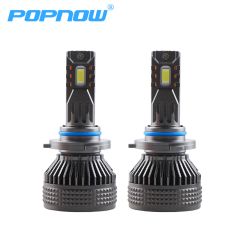
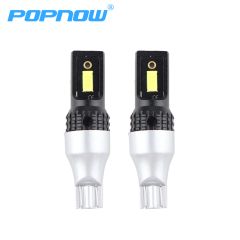
For many emergency responders, from police to firefighters and many others, lights and light strips are some of your main resources to inform other drivers that you are on the road. It is essential to maintain safety and allow the driver to move aside when an emergency vehicle passes, and the light bar is important in several ways - one of which is how to install the lights used on a given vehicle.
At popnow, we are pleased to provide the widest range of emergency vehicle LED lights, mini led strips and many other related products. We help our customers in a number of areas, from choosing the right lights for a given vehicle or how and where they need to be placed to achieve maximum efficiency. What are the most common and useful installation locations of LED light strips on emergency vehicles, and how do you choose the format most suitable for your needs? Here are some basics to keep in mind.
Above windshield
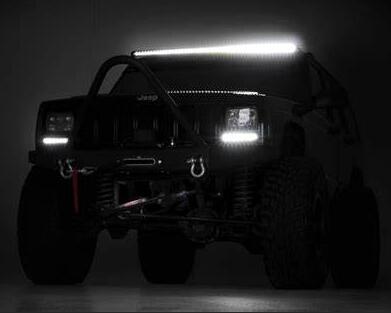
Many people are most familiar with the appearance of LED light strip, which is also the most common one on police vehicles and other vehicles. It is the style installed above the windshield. This position allows other drivers to see as much as possible, which is where many law enforcement officers are used to seeing the light bar.
Some advantages of this mounting location include:
Optimal visibility: placing the light bar in an area easily visible to other drivers is the key, and this installation location provides this.
Convenience: the light bar is easy to see and operate on the driver's seat.
Aesthetics: this installation method gives the vehicle a fashionable and professional appearance.
Familiarity of other emergency personnel: when other emergency vehicles see this light bar, they will be able to quickly and easily identify it as an emergency vehicle.
Now, for some people, this installation method may have some potential disadvantages:
More difficult to install: this light strip is usually more difficult to install because it needs to drill into the windshield.
May obstruct the driver's line of sight: if the angle is incorrect, this installation position may partially block the driver's line of sight.
May cause solar glare: the light bar can reflect sunlight and cause glare to the driver.
However, with proper installation and maintenance, these are usually not major problems for most first responders.
There are some things to consider when installing the LED light bar in this position. First, make sure there is enough space on your roof to install the light strip. You also need to make sure that the light bar is at the right angle - it should not interfere with the driver's line of sight and should tilt slightly downward to avoid glare.
Lower windshield
In other cases, the area under the windshield may be the best place to install the LED strip. This is a less common style, but it does have some advantages to consider.
Some of the benefits of this installation location include:
It can provide the best light output: if installed properly, this style can actually provide better light output than that installed above the windshield.
Unlikely to produce glare: glare is unlikely to occur because the light bar is not in the driver's line of sight.
Others may find it harder to see: while this may not be an advantage for all emergency responders, for some, setting up a light bar that is less visible to others on the road may help. For example, law enforcement officials with unmarked cars may prefer this style.
At the same time, this installation area also has some possible disadvantages:
Additional hardware: you need to budget and install additional hardware to properly support the light bar in this position.
Take up more space: this installation method will take up more space in the vehicle, which may not be suitable for all applications.
Less common: Although the installation form of the upper windshield is well known and can be recognized by other emergency rescue personnel, this style may not be so familiar.
So, is the lower windshield the best place to install the LED light bar? It depends on your needs and preferences. If you want maximum light output and don't mind the additional cost and installation time, this may be your choice. If you are looking for a more hidden option or an option that takes up less space on the vehicle, you may need to consider another installation method.
If you want to install lights in this format, cabling will also be an important consideration. Be sure to use heavy-duty wiring and connectors that can withstand the current intensity of the lamp and ensure that they are thoroughly tested before going on the road.
Front bumper
Another option for LED lamp installation is the front bumper, which is considered to be the simplest and most direct one. If you are looking for a simple installation method, or if you want to avoid drilling into your vehicle, this is a good choice.
Some of the benefits of this style include:
Easy to install: This is one of the easiest ways to install led strips, as it usually does not require any drilling or other modifications to your vehicle.
Universal type: as long as your front bumper size is appropriate, this installation method is applicable to almost any vehicle.
May provide better light output: placing the light bar in this position may help achieve better light output than some other installation positions.
Easy wiring: because the front bumper is very close to the engine compartment, the wiring here is usually simpler and easier to manage than other locations.
However, this style also has some potential disadvantages:
May block the line of sight: if you are not careful, the light bar may block the driver's line of sight.
Small overall coverage: since this light strip is installed in the front of the vehicle, it provides less overall coverage than the light strip installed on the roof or rear.
Possible damage to bumper: if installed incorrectly, the light bar may damage your front bumper.
For many vehicles, this will be the right choice for simple and effective LED strip installation. But be sure to carefully consider your needs before making a decision.
If you decide to use the front bumper mounting settings, it is important to use the correct hardware. Look for a bracket specially designed to install the light strip on the front bumper and be sure to carefully follow the manufacturer's instructions to avoid any damage to your vehicle.
Combination lamp setting
Finally, for many emergency response personnel, the combination lamp setting may be the best choice. This includes installing one light on the front bumper and another on the roof to provide 360 degree coverage around the vehicle.
Some of the benefits of this style include:
Maximum light output: This is usually the brightest setting because it provides you with two light bars, not just one.
Maximum coverage: the combination lamp setting can provide the best coverage around your vehicle and help you be seen from all angles.
Easier wiring: this style usually requires less wiring than other settings, making it easier to install.
Now, as you may have guessed, using multiple lamp installation options in the same vehicle may increase your cost. But for many respondents, the benefits of this setting outweigh any additional costs.
If you are looking for multifunctional and effective LED light bar installation options, the combination light setting may be exactly what you need. Before making a decision, be sure to consider your specific needs and preferences and ensure that you use high-quality hardware that can withstand these elements.
No matter which installation option you choose, it is important to understand the wiring requirements. Led strips require a lot of power, so be sure to use heavy wiring that can handle the current intensity consumption of the lamp. And ensure that the wiring is thoroughly tested before driving.
For more information on the installation location of the LED light bar, or to learn about any of our emergency vehicle LED lights or other products, please contact popnow professionals immediately.

