Disassembling LED car headlights to check the model requires certain steps and precautions, as follows:
Disassembly steps
1. Ensure safety: First, make sure the vehicle is turned off and the power is turned off to prevent electric shock or damage to the circuit. At the same time, find a flat and safe working environment.
2. Open the hood: Open the vehicle hood and find the location of the headlight assembly.
3. Remove the fixing screws or clips: The headlight assembly is usually fixed by screws or clips. Use appropriate tools (such as screwdrivers, wrenches) to remove these fixings. For some models, you may also need to remove the front bumper first.
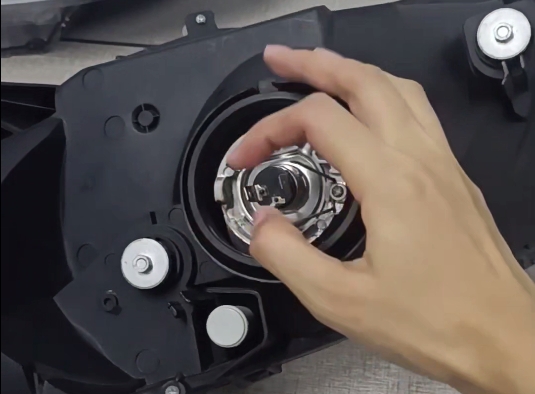
4. Remove the headlight assembly: Carefully remove the headlight assembly from the body. Be careful to handle it with care to avoid damaging other parts.
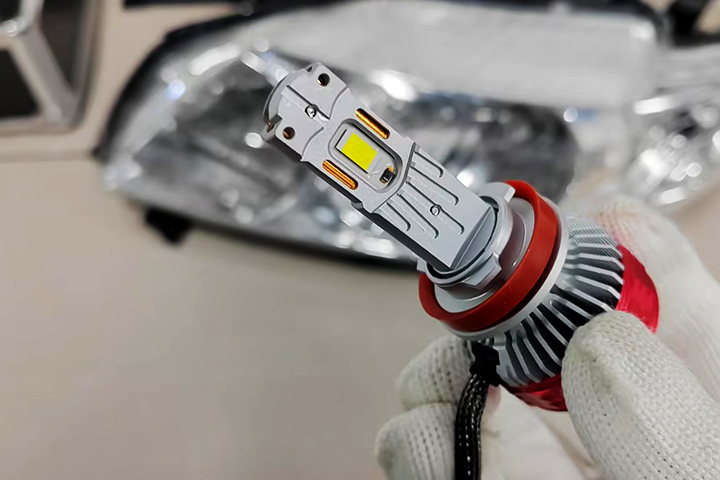
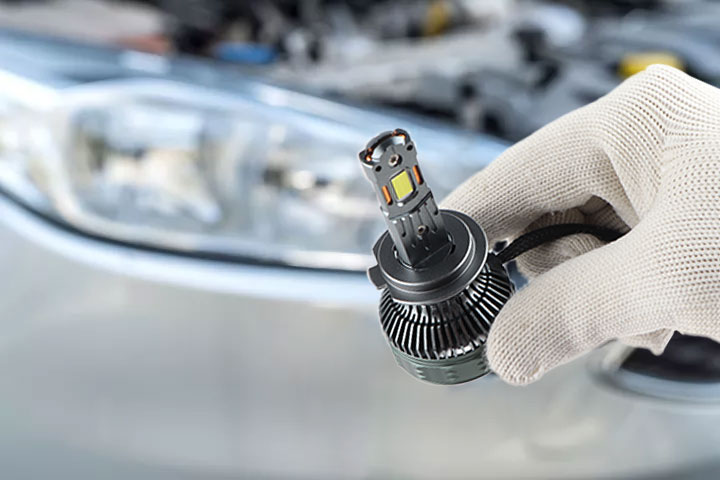
5. Remove the bulb: Find the connection plug of the LED bulb, gently press the plug buckle or rotate the plug to pull it out of the bulb socket. If the bulb is fixed by screws, use a suitable screwdriver or wrench to loosen the screws; if the bulb is fixed by a retaining ring, use a tool to carefully open the retaining ring and remove the bulb.
Precautions
1. Avoid touching the bulb directly: Grease on your hands may cause the bulb to heat unevenly and break.
2. Handle with care: Prevent the bulb from collision and damage.
3. Prevent burns: The bulb may still be hot for a period of time after it is turned off, so avoid burning your skin.
4. Keep the working environment dry: Avoid operating in a humid environment to prevent circuit failure and electric shock.
Check the model
After successfully removing the LED bulb, you can find the specific model identification at the bottom or surface of the bulb. In addition, the specific model of the car bulb may also be marked on the headlight assembly.
Please note that if you are not familiar with the vehicle circuit or headlight structure, it is recommended to seek the help of professionals for disassembly and inspection.