If you find there is excess water in the headlight chamber that you cannot easily rid of, follow the highlighted steps to remove it and seal the headlights to prevent the issue’s recurrence.
Step 1: Inspection
For the first step, you have to inspect the headlight to know the origin of the problem. Check the vents and see if there are any cracks on the headlight structure. Once you identify the problem, you have a head-start in fixing the moisture in the headlight. Inspection is a hard task and may involve detachment of the headlight assembly to check it out. Removing the assembly is a delicate process and needs you to be careful not to damage any component. Open the bonnet and start removing the clips.
You may need your mechanics tools box, where you pull out a pair of pliers or screwdriver to make the process simple. Unplug the headlight pigtail, then carefully remove the bulb, making sure you do not touch the lens and put it in a safe place. Pour the excess water from the assembly and fill it with clean water. Wipe the surface off any moisture and start checking for leaks. You can blow into the lamp chamber to see where water comes out. Where there are water traces in the place to pay attention to. Mark this area with a magic marker pen.
Step 2: Wash the Headlight
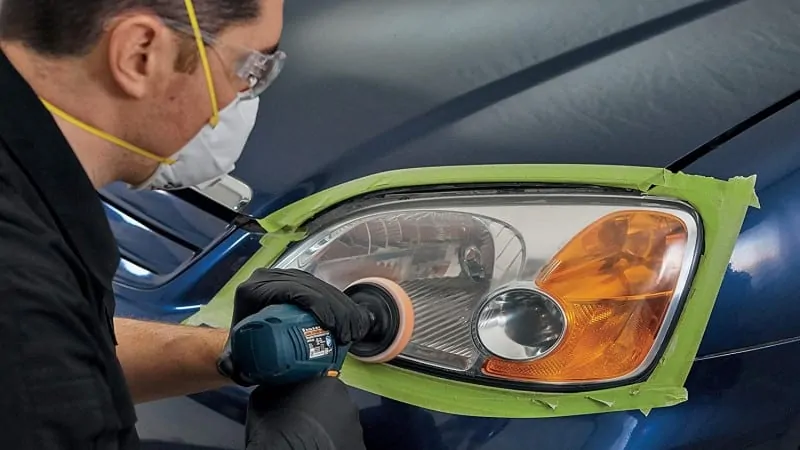
Before you seal the headlight, clean it first. When you clean inside headlights, ensure you get rid of all moisture and dirt which can get into the way of sealing it. Once it is clean, you can put it in the sun to dry or use a blow dryer to get rid of the excess moisture. If the headlight has other issues, such as yellowing, you can try out the 3M 39008 headlight restoration kit. This cleaning kit is an all-around item that will remove any yellow streaks in the headlight lens and, together with your moisture removal task, will guarantee you excellent illumination.
Step 3: Sealing the Fissures
You now set your sights on the damaged part of the headlight. With an idea of where the damage is, you bring your headlight sealant to do the task. A silicon-based or vinyl-based sealant will do the job as they are both heat and water-resistant. Most are durable and will offer a permanent seal on the affected area. Put some generous amount of the sealant on the damaged region and spread it evenly.
You can use plastic such as a credit card to aid you in properly spreading the sealing material, especially those that you should not touch with your bare hands. Once sealed, let it rest for 15-20 minutes before you reassemble it back to the car. Most sealants have a curing time of up to 24-hours, but after it is firm, you can put it back.
A point to note in the inspection part is that you should also focus on the bulb’s O-ring and the vent caps. These parts typically have a rubber build, and if the rubber wears out, you need to get a replacement. For the O-ring, you will have to replace the entire bulb or apply some dielectric grease on the surface to enhance its grip. Additionally, you can confirm whether the headlight vent holes have any blockage. A blockage can prevent the exit of water from the headlamp chamber. For efficiency purposes, you can use a desiccant packet, which acts as a headlight moisture absorber and will prevent future moisture buildup.
Method Two: Creating a Drill Hole
Another way to look at how to stop moisture in the headlight is where you drill a hole somewhere in the headlight assembly. It applies to headlights, which have a closed design, where a headlight condensation drill hole will help remove the pool of water in the chamber. Drill a hole while being careful not to damage other components of this lighting unit. Drain out the water and use a sealant to cover up the hole. Do not forget to inspect the damaged areas to prevent encountering the issue again.
How to Remove Moisture from Headlight without Opening
A look at how to remove moisture from headlight housing, you get the idea that it can be a demanding task, particularly when detaching the headlamp. The good thing is that there are hacks to try if you have such an issue without removing the assembly. The non-removal process is ideal if you do not experience too much moisture accumulation.
Wait For It to Dry
You can go the easiest way and wait for the moisture to dry away naturally. It is a great move if it is just a film of moisture. If there is a pool in the headlamp assembly, this might not be the ideal move as it will take a lot of time to clear the water.
Use a Hairdryer
You can also use a hairdryer to deal with the moisture. As earlier mentioned, the water droplets form due to the exterior cooling faster than the interior. You use the hairdryer to heat the exterior, which will, in turn, warm up the interior. This action will hasten evaporation, and the air will escape via the vent, leaving you with a moisture-free headlight. To protect the headlight, set it at low heat.

